| Print Page | Close Window |
|
|||||
|
|||||
|
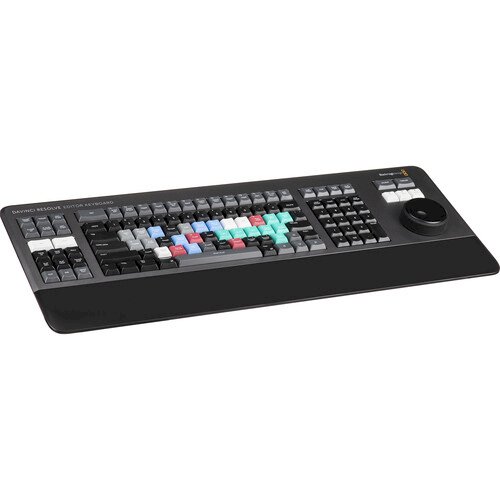
Made for DaVinci Resolve 16 and above, the DaVinci Resolve Editor Keyboard from Blackmagic Design features all-metal construction and has professional edit keys and a high-quality search wheel, allowing you to edit with both hands. For example, you can control the position within a clip with the right hand while setting in and out points and applying edits with the left. Made for DaVinci Resolve 16 and above, the DaVinci Resolve Editor Keyboard from Blackmagic Design features all-metal construction and has professional edit keys and a high-quality search wheel, allowing you to edit with both hands. For example, you can control the position within a clip with the right hand while setting in and out points and applying edits with the left. Based on feedback from professionals, it even has subtle design features such as empty space above certain keys, so they can be located by touch. It's designed to plug into USB Type-C computer ports and works without any batteries. It can be used on a desktop or inset into a console via a flange. The all-metal design includes keys with a tiered profile, instead of flat keys, so it's easy to feel your way around. The key switches are the same type used by eSports keyboards and each key is certified for over a million operations. The integrated search dial is machined from solid metal and allows for very precise transport and trimming control. There's also a handrest with a soft feel to help reduce fatigue. Plus, the keys caps, handrest, and key switches are all available as spare parts so the keyboard can be refreshed and repaired over time. The metal search dial features rubber coating and is designed with multiple roller bearings that allow for smooth operation. There's an integrated electronic clutch that creates end stops when used for shuttle and position. The dial can also be spun in jog mode to allow a natural timeline scroll. The jog control allows free movement for precise positioning of the playback point. Shuttle uses the clutch, and you can rotate forward and reverse wind to move up and down the timeline. Scroll allows scrolling up and down a long edit to navigate quickly. The innovative source button instantly creates a "source tape" of all the clips in your bin. Now you can simply scroll up and down all your media without the need to navigate thousands of clips. The clip being viewed is also highlighted in the bin in real-time. Switching between the source tape and timeline is instant. The source tape uses your bin's sort order, so you get lots of control over how shots are organized. This gives you the flexibility to find shots by time, camera, duration, or even clip name. The moment one of the bin sort buttons is selected, the source tape will be regenerated in that bin's sort order. Simply scroll up and down the source tape to find the shots needed. Sort by timecode to see all the bin media sorted by time, which is highly useful for a content shot in time order, such as live events. You can also sort by the camera, ideal for multicamera shoots where you lay down the wide shot first and then look for cutaways on other cameras. You can even sort by duration and the clip name. The in and out point buttons are designed large, and a small empty space is provided above them to allow locating them by feel. That helps when doing transport control with your right hand and punching in and out points using your left hand. When you select in and out points in the DaVinci Resolve cut page, you also trim clips. Once the in and out points are set, just reach your fingers up to the edit buttons. The in and out points can also be used to contract the source tape to limit the clips included. Then you can change the source tape back to the whole bin by pressing the Escape key. The editing functions are located just above the in and out keys, to allow a simple movement of your fingers to activate the edit you require. Because editing with a keyboard is quite different to editing on a computer's user interface, the editing functions have been optimized to take advantage of the speed of a keyboard. Most edits can be performed on the source clip without needing to place edit points on the timeline itself, eliminating time wasted switching between source and timeline. The edit points can automatically locate the nearest timeline edit or even match the timecode. A good example is Smart Insert, which locates the nearest edit and inserts at that point. Smart Insert is similar to the traditional insert edit function; however, it's smarter as it eliminates the need to switch to the timeline and place an in point. All you need to do is select smart insert and it will locate the nearest edit in the timeline and insert the clip in that location. Append to End is useful for building edits fast. Simply select an in and out point and then Append to End will add the clip to the end of the edit and increase the timeline duration. Append to End is great when adding shots to an edit form content that's been shot in time order. Ripple Overwrite is a popular edit function and it lets you replace shots extremely quickly. When applied, it will replace the clip in the timeline with the selected clip, and if the clip is a different length, it will adjust the space to accommodate the new clip and ripple the timeline duration. Close Up is best for creating two camera angles from one camera. Simply shoot your subject with a wide or mid-shot, and then when a close-up is applied, it will create a slightly zoomed-in version of the same camera shot and place it on top of the timeline. Plus, you can also apply it to a clip in the timeline. Place on Top is similar to traditional edit functions and it will place the clip on the top of the background layer that's already in the timeline. If the timeline doesn't have a layer above the background layer, Place on Top will add a new timeline-track and then place the clip on top. Source Overwrite is a faster alternative to Multicam. It automatically matches the source timecode to the source timecode of the clip in the timeline and places the clip on top. If you shoot with multiple cameras and sync timecode, you can lay other camera angles on a base-wide shot layer. With a high-quality search dial built-in, you get an accurate and fast way to trim edit points. The roll buttons allow the keyboard to take control of the search dial and very precisely adjust edit trimming. You can select the trim mode with your left hand while adjusting the trim with your right. Using roll trimming is easy and is operated by pressing and holding one of the roll buttons, depending on the type of trim you need to do, while then rotating the search dial. There's also a trim editor button on the numeric keypad that allows a direct switch to trim mode, so you can scroll up and down the edit points in a timeline to allow locating and adjusting multiple edits fast. |
|||||
|
Prices, specifications, and images are subject to change without notice. Not responsible for typographical or illustrative errors. Manufacturer rebates, terms, conditions, and expiration dates are subject to manufacturers printed forms. No permission is granted for the use of materials, information, text or graphics, and/or to hyperlink other Web Sites with this Web Site, or to use the materials on your Web Site in any way or for any reason without prior specific authorisation from Videoguys Australia. Videoguys Australia reserves all rights not expressly granted herein. VIDEOGUYS - referenced herein is a registered trademark. © 2024 Videoguys Australia All |
|||||